- Why should you compost?
- What things are compostable
- What things are not compostable and why?
- Principle of Composting: Tips you should learn before composting
- Choosing Which Type to Start Composting
- Types of Composting, Their Key Values, and Differences
- How to Make a Worm Compost Bin at Home
- When is your compost ready?
- How to Start Composting
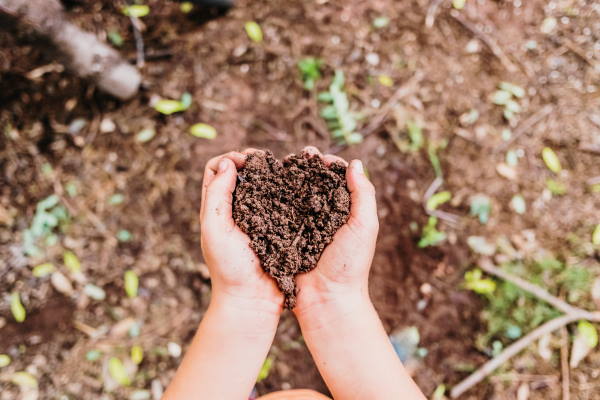
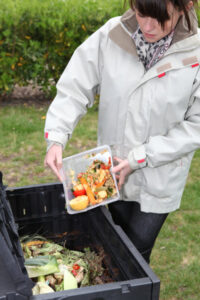
Home composting is a fun process. Composting has many benefits. It reduces waste from landfills and is great for your lawn, garden, and the environment. It’s easy to do. You can start composting at home, whether you live in an apartment or on a farm.
Home composting is simple for those who are familiar with the process. However, some garden lovers do not know how to start composting. You will learn all about composting: getting started with composting, how to compost, how to start a worm bin, and many more.
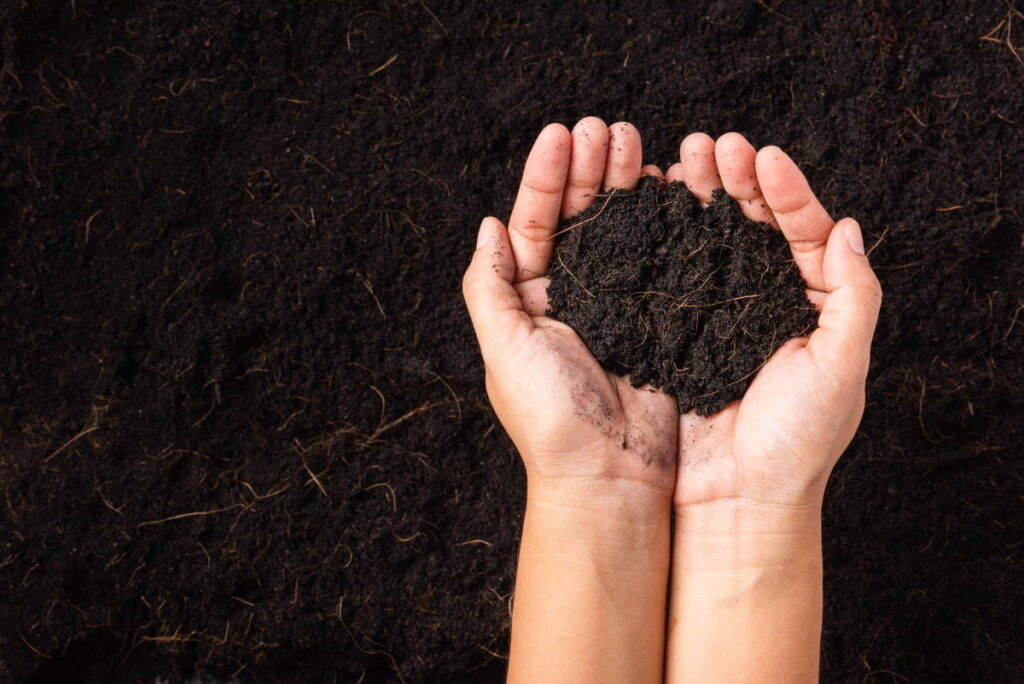
There are several ways that you can start composting at home. This article is designed to help you start composting with any of them. This article is long enough, so we will focus on outdoor methods. Later on, we will look at indoor composting methods. Compost is the black gold of nature. It takes decomposed organic material and breaks it down into nutrients that plants can use again to help them grow better and stronger. It’s the ultimate in the circle of life.
There’s a lot of information here. If you want to jump ahead, consider one of these links to go right to the section you need:
- Choosing the Right Method for You
- Closed Bin Composting
- Open Bin Composting (one of the easiest)
- Tumbler Composting
- Pit Composting (the easiest, but you want to have some land)
- Vermicomposting (uses worms, no, really, it’s fun)
Why should you compost?
We contribute to carbon emissions into the atmosphere, which affects us in several ways. For example, the ozone layer and greenhouse effect, one way or the other, affect us; and carbon will cause more harm if it continues to circulate more than recycling. Many of the things that we do every day add to carbon in the atmosphere. Almost anything that uses power, like gas or electricity, adds carbon emissions to the air, called our carbon footprint.
We can do some things to reduce our carbon footprint. For example, we can reduce how much we drive or use solar power, but some of those things are difficult or expensive. One easy way to recycle carbon (organically) is composting. Everything we add to the landfill adds to our carbon footprint. In a landfill, materials can’t break down efficiently, creating methane. Each year, over 500 tons of methane are released into the atmosphere. Composting creates a natural environment for organic materials to decompose efficiently. The resulting compost can be added to your garden, flower bed, or lawn, making the soil healthier and more conducive to growing strong plants.
Composting is a natural form of circulating natural nutrients: you transform the wastes instead of burning or burying them. According to the United States Environmental Protection Agency, the largest source of greenhouse gas emissions is burning fossil fuels for electricity, heat, and transportation. It means you are saving the future of our planet if you participate in home composting.
Another reason composting is a must for all gardens is because of the advantages associated with soil health and soil food web. Soil health deteriorates as soon as plants absorb more nutrients from the soil: non-fertile. Fertility is precious in gardening, and learning how to compost increases soil fertility and health.
Another reason is the effectiveness of the soil food web. A food web is a complex food chain: a channel of energy flow in the ecosystem. If energy refuses to flow, one part of the ecosystem enjoys living while the others die—Composting helps make an effective ecosystem.
Lastly, composting is not beneficial to plants alone; it affects humans greatly. As much as the reason you should engage in composting is unlimited, learning how to carry out the process outweighs all perfectly. First, let’s talk about compostable and non-compostable materials.
What things are compostable
Compostable materials are organic materials contributing to organic build-ups in the compost. Otherwise, the compost may harden your plant. Many organic sources contribute to safe and healthy composting if you find them in the right place. As much as organic materials are important in composting, it is necessary to consider the type of organic source. For example, a plant or organic waste treated with a chemical may ultimately harm your plants or the organisms that do the composting for us. Ensure the sources are clean. You often want to cut them up or break them up to speed up the decomposition process.
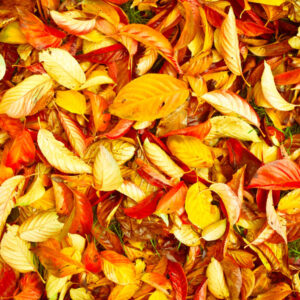
Generally, your compostable materials will fall into two buckets: green and brown materials. They’re not always those colors, but it’s not far off. Plants, fruits, and vegetables are often considered green; leaves, sawdust, and similar materials are brown. Green is rich in nitrogen, and brown is rich in carbon.
You want a good mix of brown and green material in your compost. This mix keeps your compost from stinking (you don’t want the compost to rot, or you’ve just made a mini-landfill). They also ensure that your compost breaks down optimally, grows the right microorganisms, and works as quickly as possible.
Some compostable materials include:
Fruits and vegetables
Fruits and vegetables contain a high natural organic content, particularly nitrogen. Pure food is a combination of nutrients and water. The major and minor nutrients are contained in fruits – thus, mixing fruits and vegetables enriches compost with nutrients.
Crushed eggshells
Eggshell is a source of calcium. Calcium is an essential nutrient for plants and even animals. Among the advantage of calcium is the building of cell walls. The cell walls protect, shape, and control the movement of substances within the plant. Calcium (contained in crushed eggshells) aids all the metabolic importance of a cell wall. So, do not overlook crushed eggshells if you cherish your plant or want to build enriched compost and not a less healthy organic compost. Lastly, fruits and vegetables provide the organic nutrients necessary for plant growth, while crushed eggshells provide the missing calcium!
Cardboard egg cartons are a great source of carbon for your compost.
Coffee grounds and filters; tea bags
A compost without a nutrient-fixing substance (nitrogen) is not a perfect compost. Nitrogen is an important nutrient in plant growth and development. For example, legumes perform excellently compared to cereal after a long planting/harvesting year because legumes fix (nitrogen) and other nutrients into the soil. Nitrogen promotes easy nutrient absorption and fixation into the soil. Your plant may not perform well if you mix nutrient-filled compost without nitrogen (which aids nutrient absorption). Coffee grounds and tea are good sources of nitrogen. Their bags and filters are good sources of brown material.
Nutshells
Although nut shells contain the same nutrients as many other materials; however, it improves the compost’s structure and drainage. Oxygen, CO2, and other gases naturally flow in and out of the compost if the structure and drainage are perfect.
Some Brown Materials
You don’t also need food waste to compost. You want to include a mix of materials for the right balance. This also includes using materials like these to add carbon into your compost:
- Leaves
- Sawdust
- Wood chips
- Hair and fur
- Fireplace ashes
- Shredded cardboard
- Shredded paper
- Yard trimmings
- Grass clippings
- Houseplants
- Straw
Note: Compostable materials are not limited to this list. However, the list provides accessible compost materials potentially available at home and in your garden. We have a robust database of compostable materials, which are to be cautious of. You can see the whole list here.
What things are not compostable and why?
Many things are compostable; notwithstanding, several materials (which you may want to add to your compost) are not compostable. Some of these materials include chemical treatment of foods and other harmful processes. Thus, they are not suitable as compost materials. Here are some:
Black walnut tree leaves or twigs
The property of a typical tree: it contains toxins, among other harmful substances. Black walnut tree leaves or twigs contain a reasonable percentage of toxins (juglone toxin). However, the toxin breaks down if you expose the compost to air, water, and bacteria. In short, only an expert gardener manipulates walnut leaves or twigs for composting because it takes about 2 – 4 weeks to eliminate the toxins and harmful substances. Thus, skip the leaves and twigs for experts; focus on the basics now! Thanks to nature, there is an impressive number of compostable materials.
Coal or charcoal ash
Yes, coal or charcoal ash reduces acidity and may balance the alkaline level of your compost. However, leveling the pH level is not an ordinary task you may want to engage in. compost is naturally acidic at first and may balance up later. Thus, leave coal or charcoal ash out of your compost material unless you know how to balance acidity with coal or charcoal ash. Even if you are an expert with pH, coal or charcoal ash contains additives from the burning process that may affect your plant growth. Other kinds of ash are generally okay and a good carbon source.
Dairy Products
Dairy products are prone to odors. Using any of these materials would not be a better idea (either you consider indoor or backyard composting). Dairy products or eggs restrict air because they clog together to form a big mesh with other composting material. Note that orgasms aiding composting need oxygen for survival (at least 5% – aerobic composting). The collection of clog materials reduces airflow and may endanger the final compost composition.
Diseased or insect-ridden plants
Pathogens survive harsh conditions and may survive the composting environment: it may affect your plant if applied as manure. Composting should be disease or pathogen-free, and one way you can achieve this is to reduce compost exposure to disease or insect-ridden plants.
Meat or fish bones; fats and oils
You should avoid meat, fish, or fat and oil, similar to why you should not use dairy or egg products: they are prone to odor and attract insects/pests. Flies and other insects may disturb your peace if you introduce these products; rodents are not excluded. Clamshells and shrimp shells are okay if you prepare them correctly.
Principle of Composting: Tips you should learn before composting
Tips to compost at home
- Aim For a Mix of Browns and Greens. You want to keep the proper balance of brown and green material (carbon and nitrogen-rich material) – the green matters are from the kitchen: waste, foods, fruits, or fresh grass clippings. The brown materials are from the environment/field: straw, sawdust, and fallen/dead leaves. We give you a lot more information (and some easy instructions so that you don’t have to be a botanist. Read More) Read More: The Perfect Compost Ratio Brown to Green in 1 Easy Step
- Slice, dice, and make it smaller. The size of the organic material affects the decomposition process: the smaller the size, the faster it decomposes. Thus, chopping or shredding compostable materials decreases composting time; it ensures that microorganisms are behind acting on the matter in no time. While you increase the surface area by chopping the organic matter, ensure you add a substantial amount of brown matter to keep the microorganism active.
- Kitchen waste is not the only option. Check the list of the compostables above; you will see that all the compostables are not readily available in the kitchen. Even though food waste/kitchen waste contributes to a larger percentage of organic matter, some good compostables are still not in the kitchen. However, note that the material you will add is compostable without potentially causing a nuisance.
Tips on making the best compost
- Skip seeds. You can compost grasses. However, skip grasses with seed. Composting grass is a factor of temperature: seeds in grass may not decompose because of the low temperature. Thus, skip seeds, assuming the compost will not be hot enough to decompose it. (Commercial composting can often take seeds).
- You may add paper. All paper is not compostable: some papers contain chemicals that inhibit the composting process. However, non-glossy paper enhances composting and reduces the loads on the organic because microorganisms act efficiently with paper products. Read More: Can You Compost Paper
- Skip milk. Milk and other dairy products do not make good compost. The United States Environmental Protection Agency does not recommend adding milk to composting, although some gardeners add milk. The first reason is the effect of soured milk on the environment: it causes pollution. If placed outdoors, the compost containing milk products attracts animals.
Tips when you want to make your compost
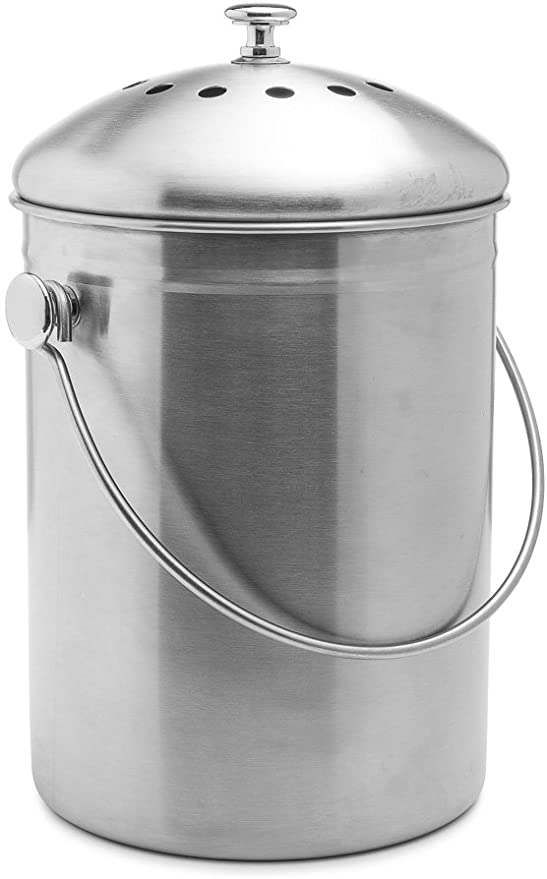
- Make use of a tight-fitting lid. A tight-fitting lid is helpful if you use a bin or other container because it reduces exposure and how gnats and insects react to the mixture. The smell reduces and attracts fewer animals if the compost is adequately kept air-tight. You may also select a bin with a handle, a bonus for easy locomotion. For compost piles, you obviously won’t have a lid. Turning your compost and keeping animal products are usually enough to keep pests and smells out of your compost pile. Compost shouldn’t stink.
- Differentiate a compost bucket from a compost pile. Utilize a bucket to gather compostable family waste and dump it into the compost heap afterward. A waste bucket is not a composter; if you attempt to involve it as one, you’ll have a stinky wreck on your hands (and kitchen counter).
- Empty Your Compost Bucket At least Every Few Days – Even if not full. Indeed, even compost containers with tight-fitting tops can draw in bugs or smell if left for a long time. Pieces of decaying vegetable pieces and other natural matter can grip the internal parts and influence them to smell. Assuming your compost heap is dry, dump the wash water on it and tackle two issues immediately.
- Keep your compost pile damp. For decay to happen, your compost heap needs heat, air, and moisture. To access the compost for dampness, bring some of it into your hand and press. Assuming it drips, your heap is excessively wet. Put some brown matter. It should be about as moist as a damp sponge.
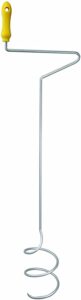
- Turn Your Compost Periodically. As indicated above, oxygen and dampness are essential to the disintegration cycle. Turn it with a pitchfork or nursery fork consistently to keep your compost heap sufficiently circulated air through. Read More: Turning Your Compost
- You may place your composter or compost heap close to a water source. This will make it more helpful for you when you want to add water to the pile. Also, the compost should not dry out; keeping it near a water source makes the environment cool instead of hot.
- Your compost heap doesn’t need to be in full sun. Pretty much any area will work, insofar as the pile isn’t close to trees and different plants that will drain supplements from it. In warm environments, an obscure spot frequently works better than a full-sun district that causes composting matter to dry out excessively fast. If you’re using vermicomposting with worms, you probably don’t want it in the sun. Worms don’t like warm weather and won’t compost as well when hot. In a shady area is great for them.
- Greater isn’t guaranteed to be better. Compost heaps that are too enormous might be challenging to circulate air through. Most specialists prescribe heaps in the 3 to 5 feet long, level and width. More modest heaps might miss the mark on mass expected to reach and keep up with the high temperatures fundamental for decay. If you have more to compost, consider another heap.
Tips for working with a composter
- Consider a versatile composter if your backyard is spacious. Simple to-move wood and wire composters make reworking your scene (and moving compost near where you will utilize it) a snap.
- Short on space? Utilize a barrel or a sack. You can make your compost on your porch or deck in a spacious home by setting the compostable natural matter in 40-gallon plastic trash containers or rock-solid polyethylene trash bins.
- Heaps of room but no budget? Attempt natively constructed barrel composters or straw bundle composting bins. Barrel composters might be utilized for many years, and straw bundles make reasonable structure blocks for impermanent composters.
- In need of money and space? Compost openings, some of the time called channel composting, perhaps the response.
- Loads of room and no extra money? You can, in any case, compost. Permit your compost heap to be a green and brown natural matter that you occasionally soak and circulate air through. Almost any type of composting doesn’t need to cost much money. A compost pit is basically free with a little bit of elbow grease.
- Consider composting inside. Assuming you have neither the room nor the tendency to make compost in your yard, a few very much evaluated indoor composters and bokashi units are accessible. Read More: Indoor Composting
Choosing Which Type to Start Composting
There are several types of composting. It can be a bit confusing. It doesn’t need to be. They all work the same way. You mix compostable materials; for most types, you turn it periodically. You collect your compost and then add it to your garden or lawn. Let’s look at some options:
We will look at the various types and some of their characteristics.
| Type of Composting | Characteristic | Costs | Effort/Work |
|---|---|---|---|
| Closed Bin Composting | – Limited amount of material – Doesn’t take a lot of space – Can smell, but doesn’t attract pests – Won’t turn often – Can be messy to harvest compost | Free if you want to make your own bin, but often easier to buy a bin | Low work |
| Open Bin Composting | – Very easy – Needs some space – Needs to be turned With one bin/pile can be difficult to harvest | Low cost. You may want to buy stuff to make a bin and maintain the pile, but it doesn’t need much. | Moderate effort. Need to turn your compost periodically. Want to ensure you don’t include anything that might attract pests |
| Tumbler Composting | – Fairly easy – Can smell (when open) – Easy to turn – A bit easier than a closed bin to harvest compost Low space | Moderate one-time cost. You can make your own tumbler but otherwise may want to buy one. | Fairly low effort. Turning is easy. |
| Pit Composting | – Easiest form of composting – Can smell – Want away from your house – Work to harvest – Takes a long time – Need to have all your compostable material when you have the pit dug | No cost | Moderate amount of work. You have to dig a trench or pit and then cover it up again. Have to dig the compost up again 6-12 months later |
| Vermicomposting | – Uses worms to help with composting – Don’t want to be squeamish – Can be fun, especially for kids – Fairly easy and quick (for composting) A few things you can compost in other areas that you need to be careful of (e.g. citrus) | Moderate cost – usually want to buy a bin and worms. Not all that expensive, can also get a starter kit that helps you get started | Low effort, add food, turn it periodically. Harvesting takes a few minutes but isn’t hard. |
This guide will help you pick a form of composting and help you get started. Composting is easy, but all the terms and what you can and can’t compost can seem overwhelming. It’s not. Remember, nature has been doing this for a long time; for that reason, it usually just works.
Composting is easy, but all the terms and what you can and can’t compost can seem overwhelming. It’s not. Remember, nature has been doing this for a long time; for that reason, it usually just works.
Types of Composting, Their Key Values, and Differences
Knowing what is compostable is not enough; you should also learn the types of composting and their values. Although many composting methods are available, they all follow the same principle: taking organic material and creating the right environment for it to decompose.
The composting process determines the type of compost; compost type is applicable based on geographical locations. For example, closed bin composting is applicable in urban and suburban locations because it is a cold-composting method. More of these values are below:
Closed Bin Composting
Closed bin materials are not difficult to source and are available in cylindrical or circular shapes. They are easy to make, even from the collection in your garage. So, one of the leading benefits of a closed bin is the availability of materials that enclose the composting process from the outside world. Many ready-made closed bin composting are available in garden stores, although you can make it at home.
The closed bin is enclosed and safe from pests and rodents. Pests and rodents affect the decomposition and may not give the rich-dark compost humus. Even if pests and rodents affect other “open bin composting,” they cannot enter the composition in a closed bin composting.
A closed bin speeds up the decomposition, unlike an open bin. The rate may likely be enough reason to select the type of composting method. Aside from the speed, closed bin composting provides dark, nutrient-rich, and humus compost. The compost is suitable for many plants and equally disease-free because the production system is a closed one.
A closed bin shows some observable difficulties during and after the composting. For example, a closed vessel does not allow smooth ventilation (airflow), which means oxygen does not circulate during the composting. Limited airflow prevents heat balance and increases the inner temperature. The temperature is difficult to maintain (for example, keeping the temperature at 100.4 °F). Cold composting applies to unregulated temperature changes; thus, a closed bin is unsuitable for hot composting.
A closed bin has a defined volume. Unlike an open bin, a close cannot hold a large amount of compost material. When you buy a composite bin, you should note that the quantity and space are important. It occupies a small space, although it cannot take a large amount of compost.
Normally with compost, you have to turn it periodically to mix up the material and add oxygen and moisture throughout the compost.
Turning compost in a closed bin is difficult because the bottom is sealed, and the opening is usually “1 foot” above the ground. You may waste some compost if you try to turn the compost manually. However, you can preserve the compost better if you transport the top compost to a new location and harvest the bottom. Closed bins are not expensive because they are limited in size. The bin is suitable for small gardens.
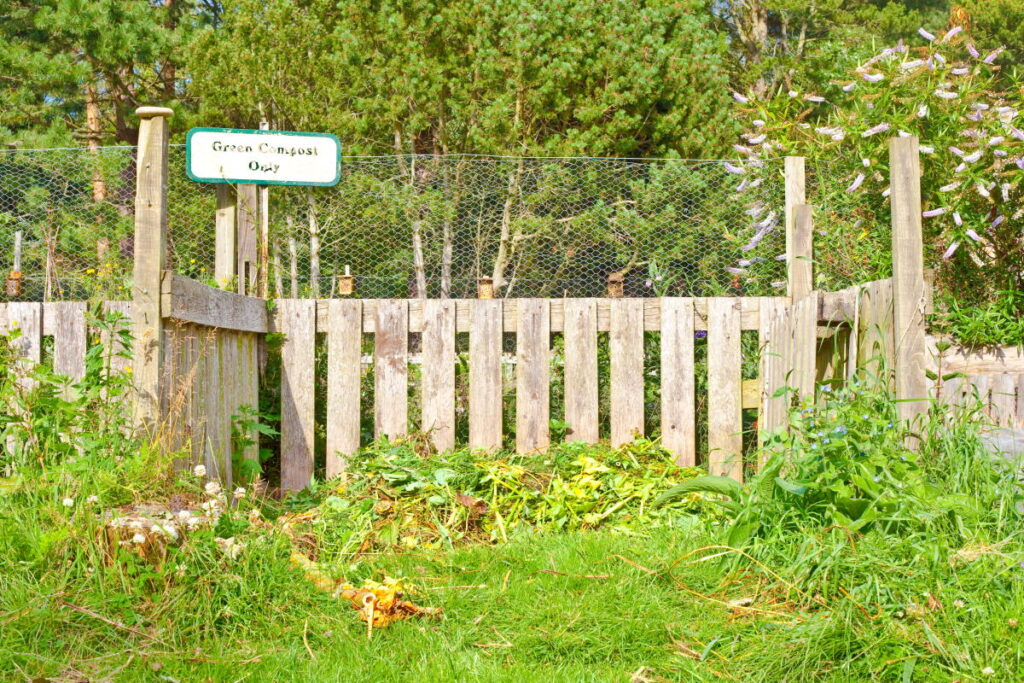
Open Bin Composting
Open bin composting is a versatile method for the home. The composting method affects the output and what you can compost. In addition, open bin composting uses wire or wood for the structure. Unlike a closed bin, the open bin is easy to use and permits smooth turning.
Open bin composting permits easy airflow, decomposition speed, effortless harvesting, and circulation. All compost materials (both upper and bottom) receive the same treatment with open bin compositing. For example, keeping the upper part of compost in the best state in a closed bin is hard. However, you can quickly turn an open bin compost.
Making open bin composting may not cost much if you use poultry netting or wire fencing. It might take some time if you want to build a bin or bins. Some prefer multiple bins.
An open bin is easy to build, similar to a closed bin; however, the bin does not require a closed lid and requires a net or wood for fencing. The materials (net or wood) give space for turning compost, even during hot composting. Usually, a few feet will do it.
The bin keeps compost tidy and partially secure from the public. An average person may not know about open bin composition since it looks tidy. In addition, you and your neighbor can stay around the compost without significant irritation. Lastly, an open bin may be expensive compared to closed bin composting.
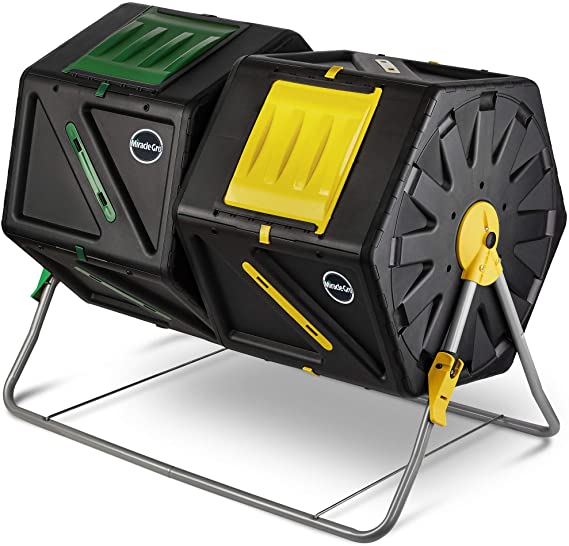
Tumbler Composting
Tumblers are similar to closed bin composting: the lid hides content from the outside world and is less burden. As much as the tumblers ease the burden of turning compost, it significantly outweighs a closed bin. A closed bin does not permit easy compost turning, although you may navigate this via improvising. However, tumblers are above the ground and made with a handle for turning.
Turning a tumbler is easy: simply hold on to the handle and turn it counter-clockwise or otherwise. In addition, some tumblers do not have a handle – still, you can turn them with your hand.
The tumblers take in more compost, unlike closed bin composting. Making a tumbler is pretty easy at home: you can use a 55-gallon drum or tight-fitting plastic garbage – provided the material is cylindrical and tight-fitting. You can also buy ready-made tumblers already set up for composting.
A tumbler is suitable for making cold composting: making a hot composting set up is difficult with a tumbler: maintaining temperature, transporting, and regulating pathogens and weeds is challenging.
It helps if you consider adding soil to your tumbler content increases organic breakdown. The tumbler is raised above the ground preventing it from undergoing natural organic formation. Aside from this, harvesting compost from the tumbler is relatively difficult. There are excellent, affordable off-the-shelf tumblers available.
Pit Composting
Do you want your compost entirely out of your sight? If yes, pit composting is the best for you. You accomplish this composting method by burying compost materials into a hole or trench – just as simple as that. However, it takes about 6 – 12 months before the materials decompose. They can also stink, so it’s best to pick a place that’s not close to your house or where you will spend a lot of time.
Pit composting is the best method for composting grasses and weeds. If you dig the hole deep, the weeds will not receive light to thrive again; they will decompose and provide organic nutrients. You can compost weeds in other systems, but if you don’t do it right, you could find weeds growing in your garden or lawn, so make sure to take care.
Although pit composting costs $0, it isn’t easy to harvest. You must dig up the trench and move the compost to your garden or lawn.
Pit composting advantages include less expertise and labor. You just wait. While other composting methods require a bit more care, pit composting is free and easy: you can engage with zero resources or experience. Compost turning promotes effective decomposition and makes the compost ready in no time. While this process is essential in other composting methods, it is not necessary for pit composting. Pit composting holds compost as much as you can supply. The ground is unlimited; likewise, the potential capacity in holding compost. Although pit composting cannot do hot composting, it is suitable for any area.
Vermicomposting
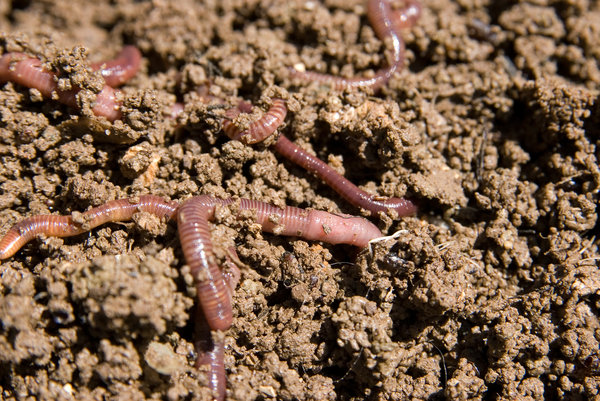
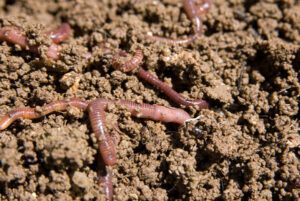
Vermicomposting is a process of using worms for decomposition. Worms are not the only active organism in this case, but they are mainly employed to decompose your food or waste. Decomposing via worms reduces cost and increases control of your control over the whole process. Believe it or not, it can also be a lot of fun to start composting with worms.
For example, you can regulate worm activities since you can see them and regulate their activities. Vermicomposting is widely employed, especially in making a small compost pile.
Dead leaves, shredded paper, or straw are the primary materials used in making vermicomposting space. The method is the best for you if you stay in an apartment or have little room for decomposing. Vermicomposting is versatile: you can do it indoors, in the backyard, in the garage, or in other places – including a 15-liter cylindrical material. It doesn’t take a lot of expertise, and you can vermicompost with a little or a lot of space (it’s how we got started with composting.)
Vermicomposting active worms are Red wigglers (Eisenia fetida): the worms actively act on any compostable. The worms feed on the material, reproduce, and decompose them.
Harvesting vermicomposting is easy compared to other methods; however, it takes weeks before you can finish the task. You may use the translocation method: move the materials (containing worms) you want to harvest to one side of the container and add fresh materials (worm-free) to the other side of the container. The worms migrate to the untouched side, making the other side worm-free. Then, you can harvest the worm-free side.
You can also put the compost into a small bin, worms and all. Once the worms see the light, they will hide deeper in the compost. You then use a trowel to remove the top layer of compost and do it again until you have mostly worms. They go back in the bin until next time.
How to Make a Worm Compost Bin at Home
Making compost at home is easy and fun. Before you start composting with a bin, you can select the compost bin material from anything at home: cylindrical or a big vessel. You will need a drill and dirt. You can also use these instructions (without the worms) for bin composting, or you can just make a pile depending on your space needs.
If you opt for the pile, then start the instructions at step 3.
Select a bin
A tight-fitting lid is necessary to keep the soil intact and moist for an extended period. You can buy this preferred plastic bin if you do not have one at home. A 30-gallon plastic bin which is about 24 inches, is far better. This selection gives you space for composting with a substantial amount in check. You may select any color; it does not matter. You may choose a color that blends with the environment (if you are buying a bin. Get your drill machine ready!
Make holes
You will make holes at the bottom and lid: keep it at a 3/16″ drill or similar measure. Organic waste undergoes aerobic composting: air enters through the holes for effectiveness. Ensure you keep the lid air-tight: do not tamper with the opening while drilling. Also, ensure you move the holes from the bin edges, likewise the sides – only the top and bottom. The worms need to breathe too.
Make a Brown Base
Compost comes in green/brown layers: making the brown base with dead leaves or twigs is the beginning of your brown base. Start making a brown base by placing some dry leaves on the base of the compost bin.
Add Dirt
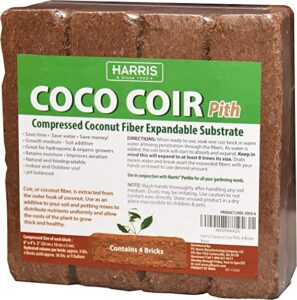
Your dirt does not have to contain worms. We have a lot of dirt around – ensure you half fill the container. More so, you may purchase topsoil if necessary. You can also add a bed of coconut coir (or combine them.) The warms really like the coir, which keeps them warm and will eventually be composted. You can buy bricks of it from Amazon or local garden shops. Break up the bricks and make it a bed for the worms.
Add the food waste to the compost bin
You have added the brown part; now, add the green (organic) part. Place the food and organic materials you want to compost in the bin. Again, recall the material you should compost and those you should not. Please, check the previous part for a better understanding. Note: some materials are industrially compostable, but not at home. For example, suppose you buy material with a “compostable” sign. In that case, it may indicate that it is compostable industrially and not at home – thus, you may create a problem with the compost if you use them as compostable.
Add the Worms
Now for your worms. Red wiggle worms make great composting worms. We get ours from Uncle Jim’s Worm Farm (yes, really). They have many options on amounts, great expertise, and clear directions. You can also get their worms from Amazon, but they seem to last longer from Uncle Jim’s directly.
The worms will arrive dried out, and they may look dead. They’re not. Add them to your compost and add some water. they’ll perk up in a day or two. We start with 1,000-2,000 worms, depending on the size of your pile.
This is a one-time step if you keep your compost pile healthy and the worms happy.
Obviously, if you’re not doing vermicomposting, there’s no need to do this step.
Stir the compost
Making a mixture of the compost is not enough without stirring. Ensure you stir the materials inside the bin effectively. You may use a stick or shovel to stir the mixture. You can also use a device specifically for stirring. Making a mixture of the compost is not enough without stirring. Ensure you stir the materials inside the bin effectively. You may use a stick or shovel to stir the mixture. Cover the food material with dirt. Cover the food material with dirt.
Add Moisture
Too much water causes the compost to smell. Just moist, do not over wet or soak wet! You may use a sprayer for efficiency.
Place in a perfect spot
Placing the bin inside a full sun is not a perfect idea. The sun dries out the compost in no time. Ensure the spot is free of heat or at least (minimal). You can place the compost bin in the garage or a shady area away from your house. You can also put it in the backyard.
For worm composting, you may want to consider burying your worm bin. This will allow the worms space to move in and out. You can bury it about halfway into the dirt (even in your garden if you want.)
Your Compost Is Started!
Now you can feed your compost pile or bin with brown and green material, turn it periodically and keep it moist. Have fun!
Tools:
- Drill
Materials: Large bin or drum, Dirt, Red Wiggler Worms
When is your compost ready?
First, the compost should have the same temperature as air when no decomposition occurs. Ensure you check the temperature at suitable intervals to know when the compost may be ready. For a compost pit, it takes about 6 – 12 months for finished composting to happen. For a bin or worms, composting is more of an ongoing process. This can take from a few weeks to a few months. You may need to separate the completed compost from the still composting material.
Finished compost should have an earthy or exhibit no smell. The temperature should be the same as the air, while the scent should be the same as the earth. Fully composted material should not have a strong odor. It will generally have a more pungent smell if it’s still undergoing decomposition. Also, a typical compost is dark and crumbly. The compost is not done if it is wet or clumpy.
You can create as many bins as possible. However, ensure you keep 1/3 of the compost even after harvesting to continue the process (if you want to continue composting).
How to Start Composting
There is still more to learn, but our goal was to help you start composting by picking a type of composting, get the basic set-up, and give you the beginning parts of how to care for it. Once it’s started, you will look at waste in your house, asking, “can you compost this or that?” If it’s organic, there is a good chance that you can.
It’s a fun time to start composting. You are helping give waste back to nature and feed your garden or lawn simultaneously. We post articles from time to time on how to care for your compost, how to get more out of it or the latest in composting news (yes, there’s news for composting.) Welcome to the club and have fun with it!